In this diary, I’m going to explain how I draw buildings (and shape in general), with my tricks for doing the most precise work possible and achieving the greatest possible symmetry and alignment, but without measuring everything out either.
It’s my meticulous way of trying to do things as perfectly as possible, and everyone does it the way they want. There are many times when I do things more simply and less precisely
Tip 1: Use JOSM

The JOSM editor is essential for perfect building creation, in combination with the “buildings_tools” and “utilsplugin2” plugins! 
I also use many JOSM shortcuts.
Tip 2: Perfect extrusion
✔️ Do
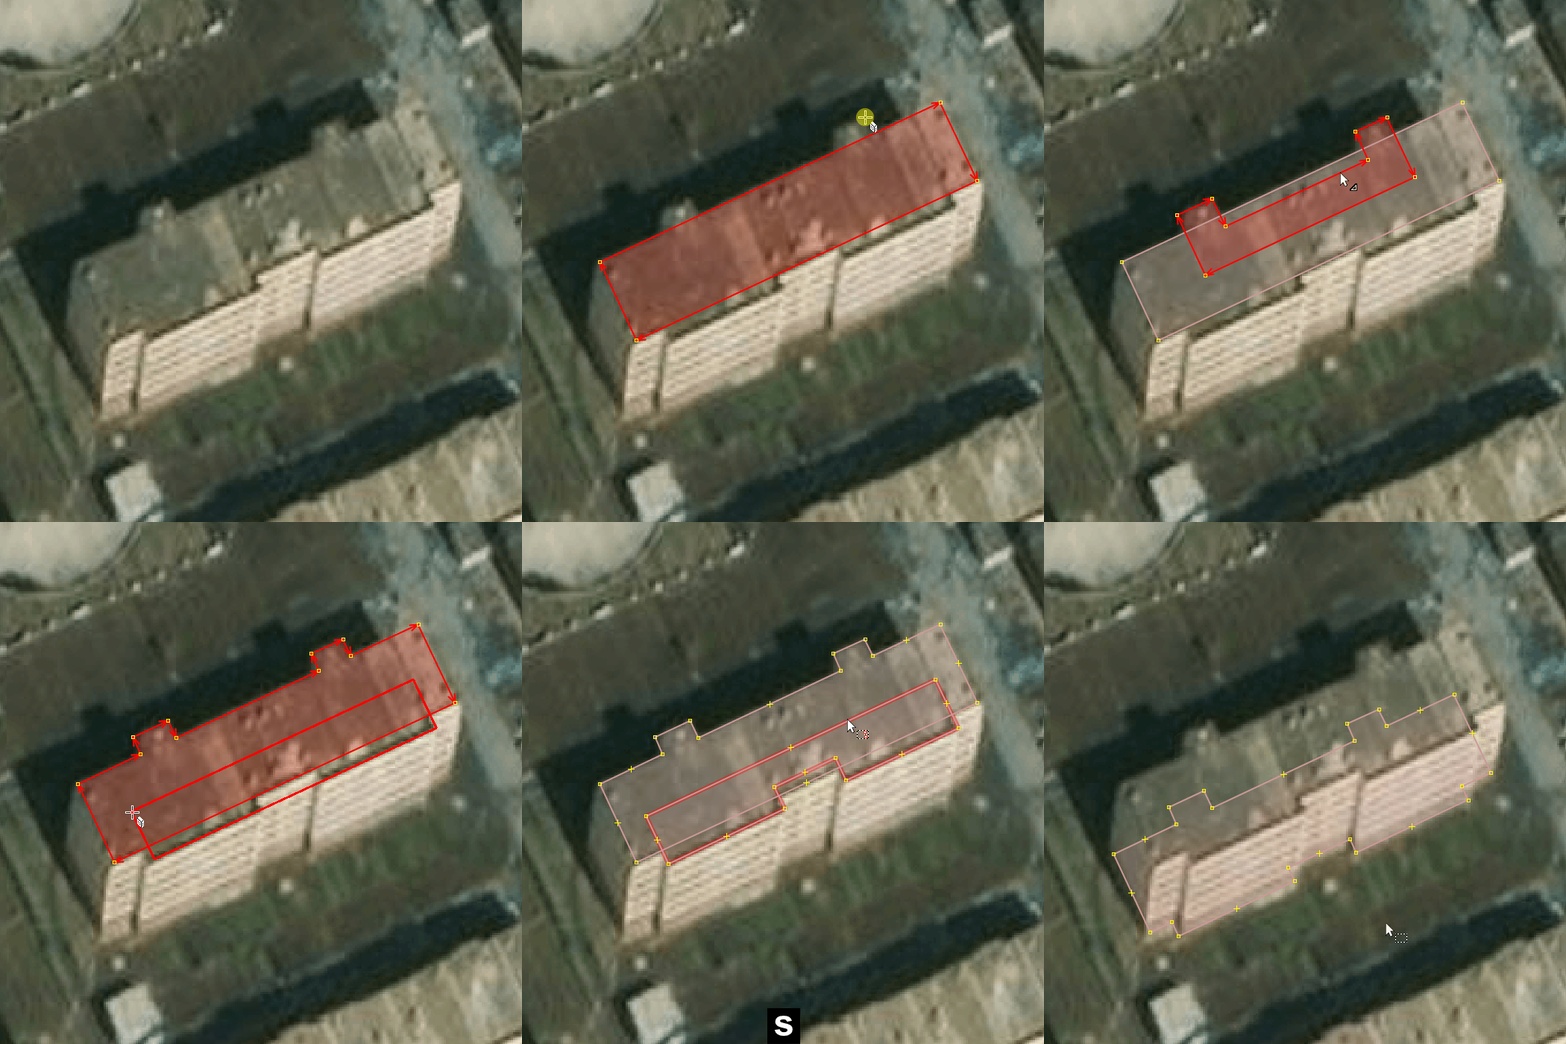
Because: Using a second rectangle and then extruding keeps the top two parts of the building aligned, same for the bottom.
❌ Don’t do
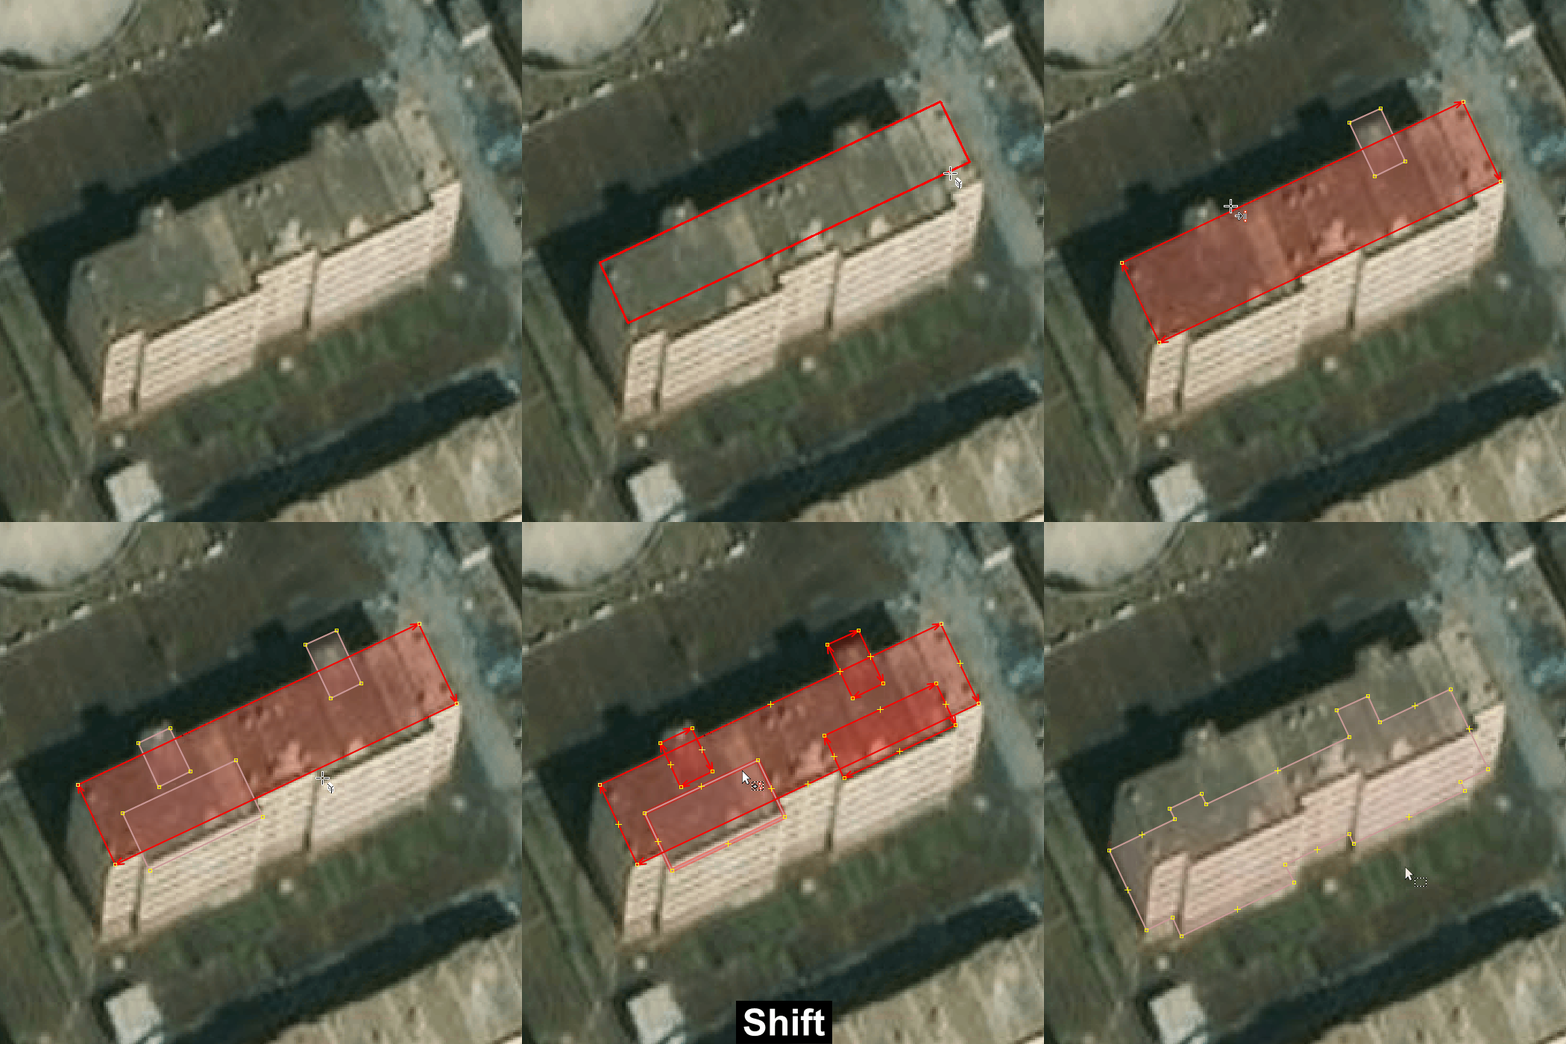
Because: Doing the two small parts on top and on bottom one by one doesn’t ensure that they’re correctly aligned.
Tip 3: Perfect extrusion bis
✔️ Do
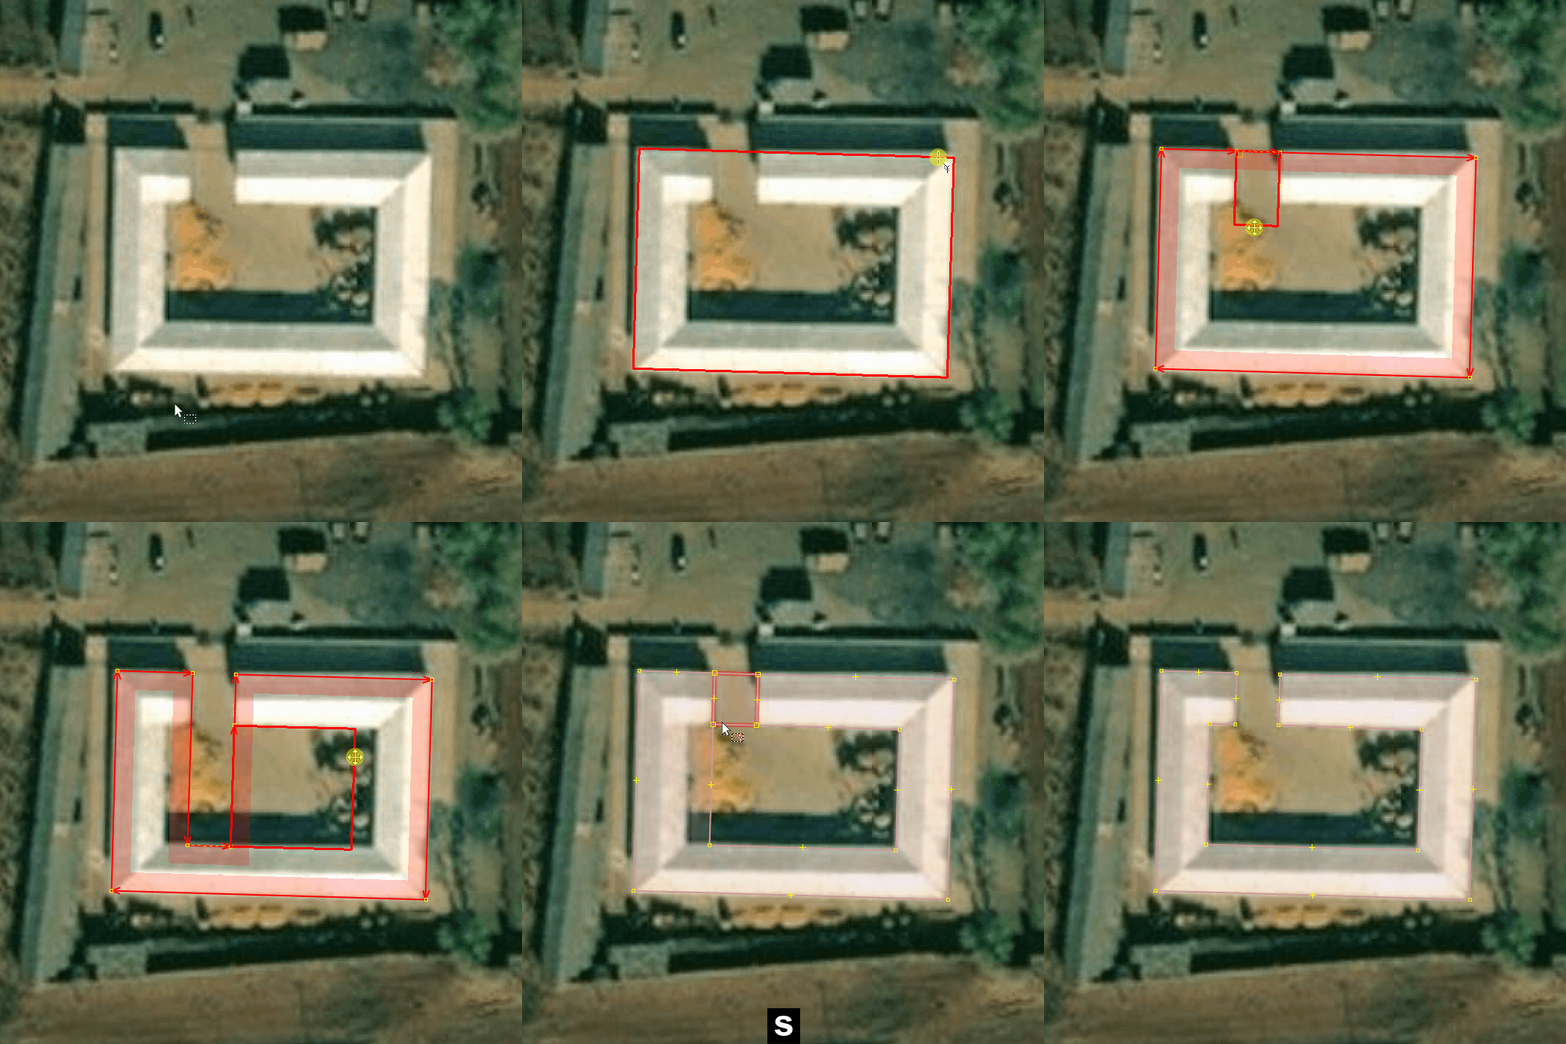
Because: Using a rectangle which is then extruded ensures perfect alignment for each side.
❌ Don’t do
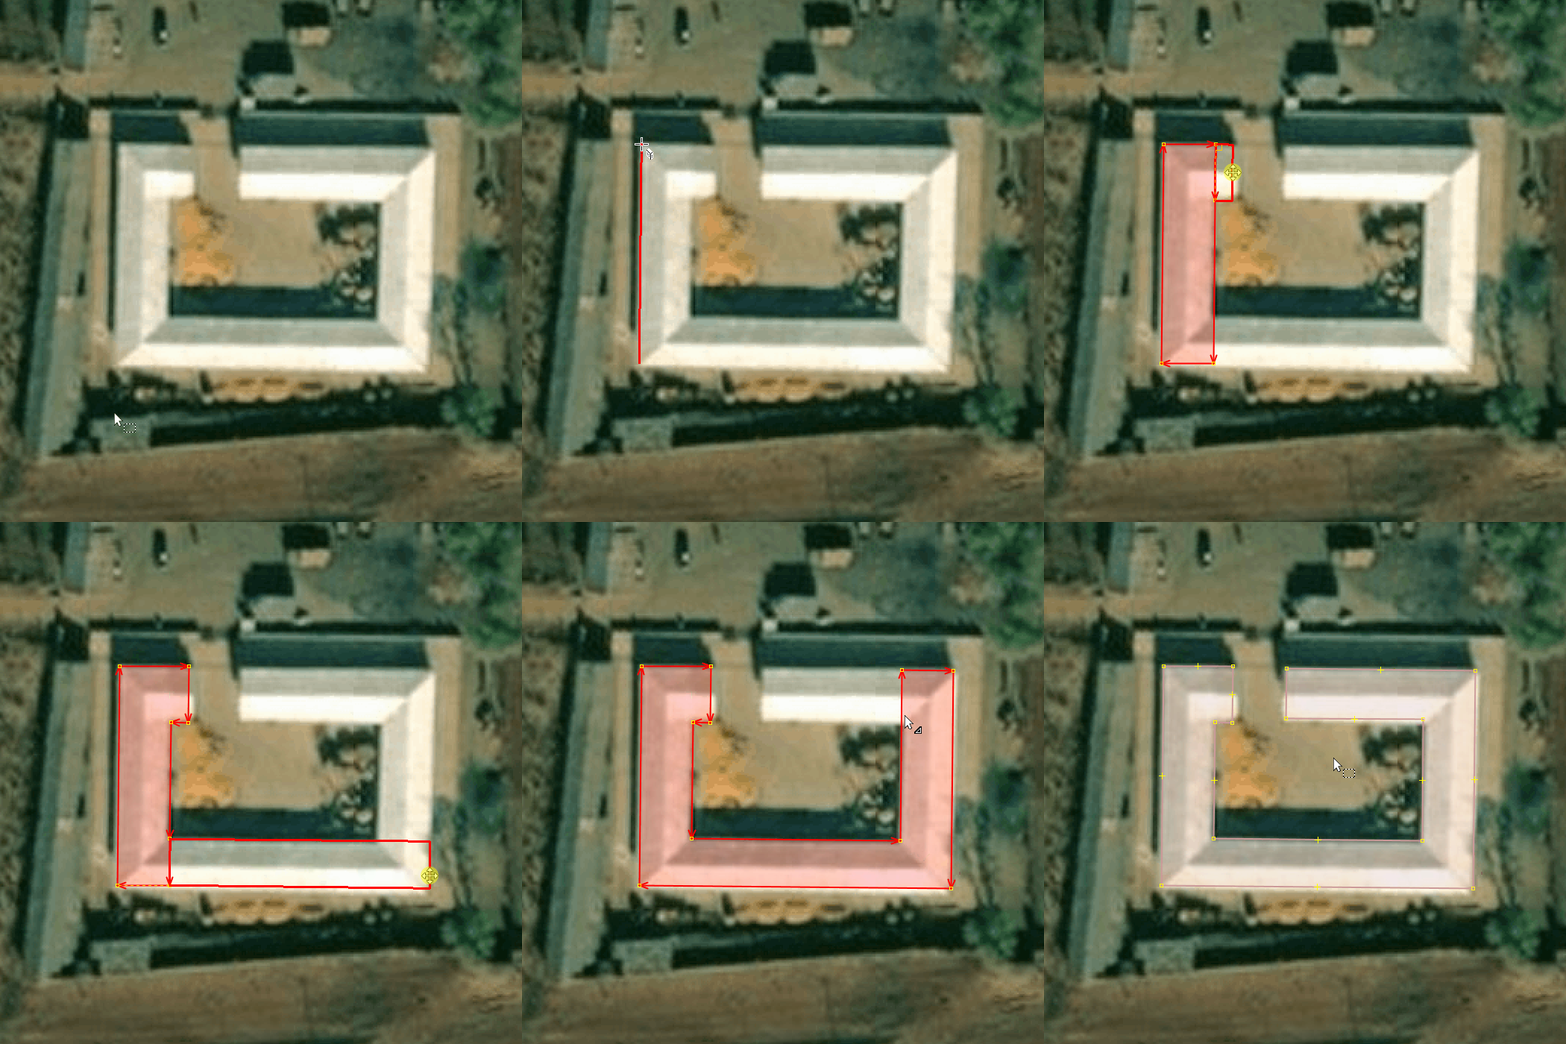
Because: Making each part after the other means that the two sides can have different widths and not be aligned.
Tip 4: Perfect extrusion ter
✔️ Do
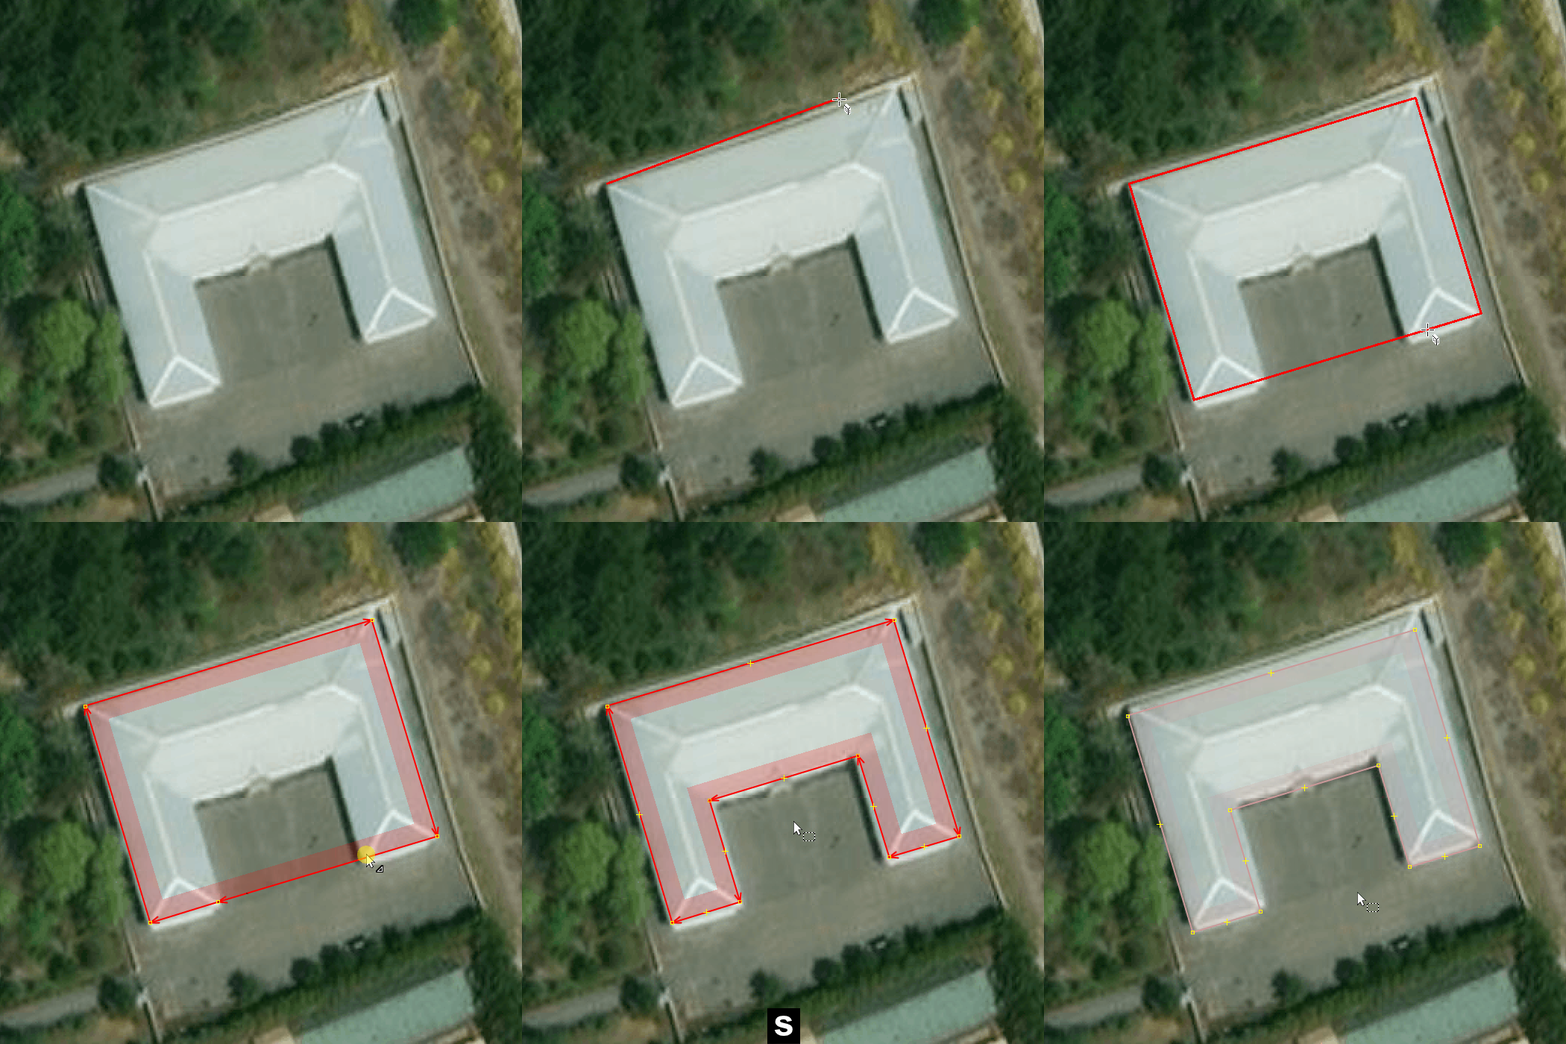
Because: Extruding the building keeps it perfectly aligned.
❌ Don’t do
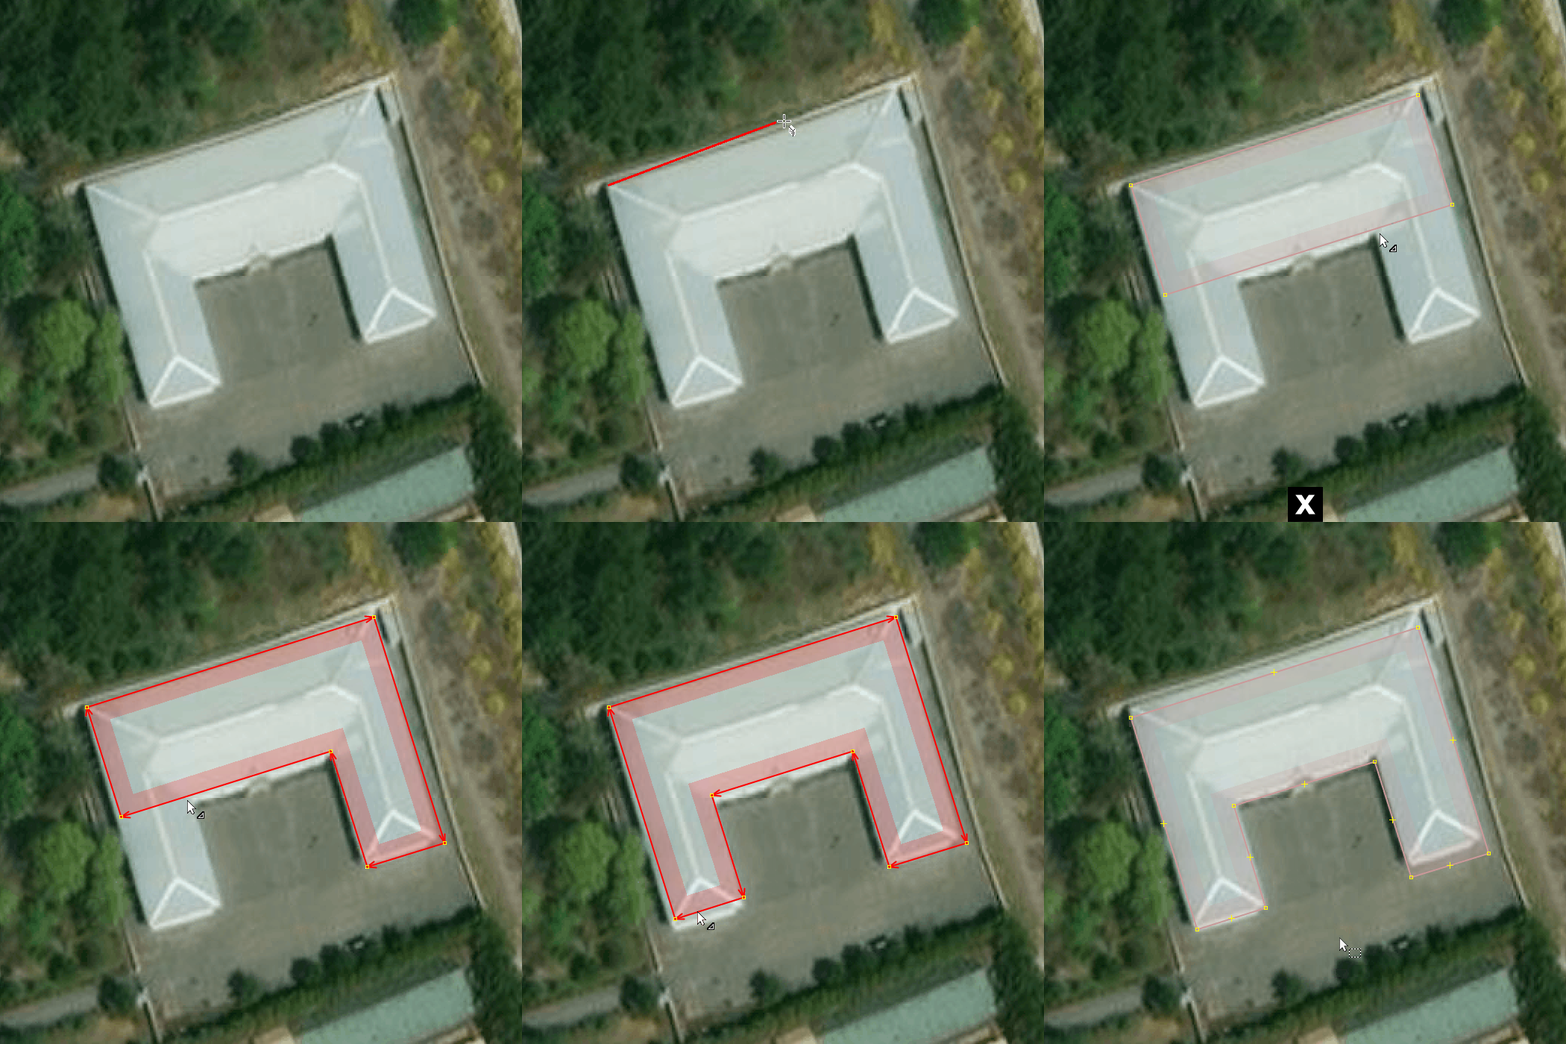
Because: Extruding one by one doesn’t let you know on both parts are aligned.
Tip 5: Perfect extrusion quater
✔️ Do
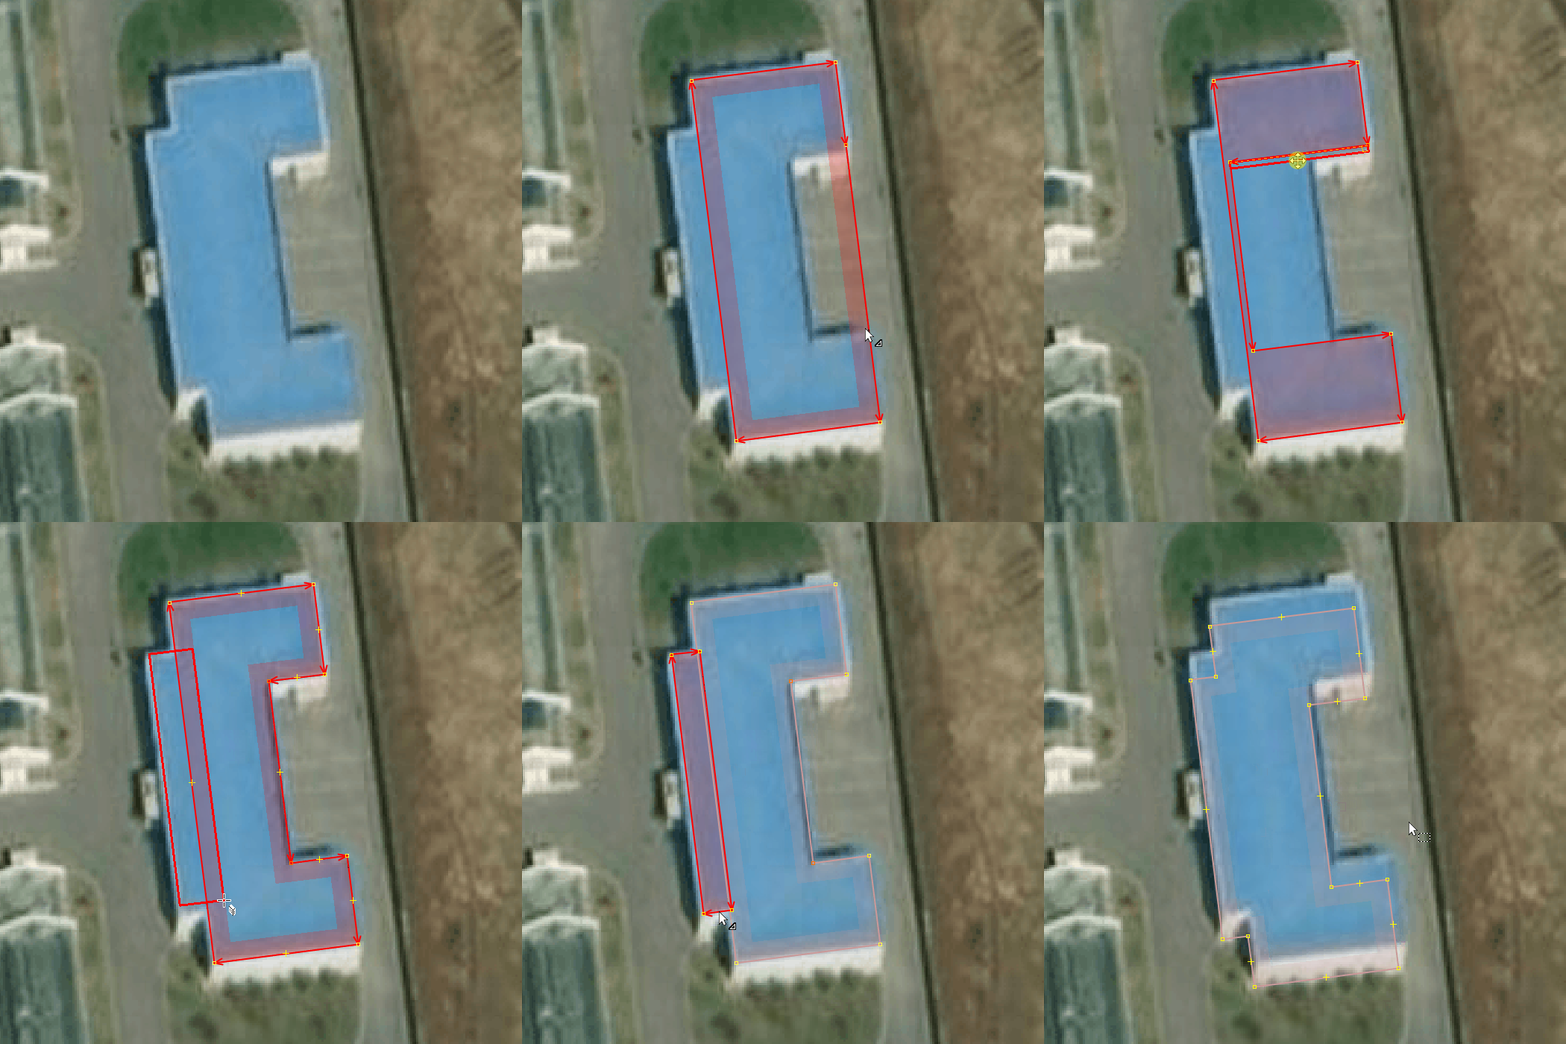
Because: The little yellow crosses between the segments can be used to check whether the parts are proportional, and also to align different blocks perfectly.
❌ Don’t do
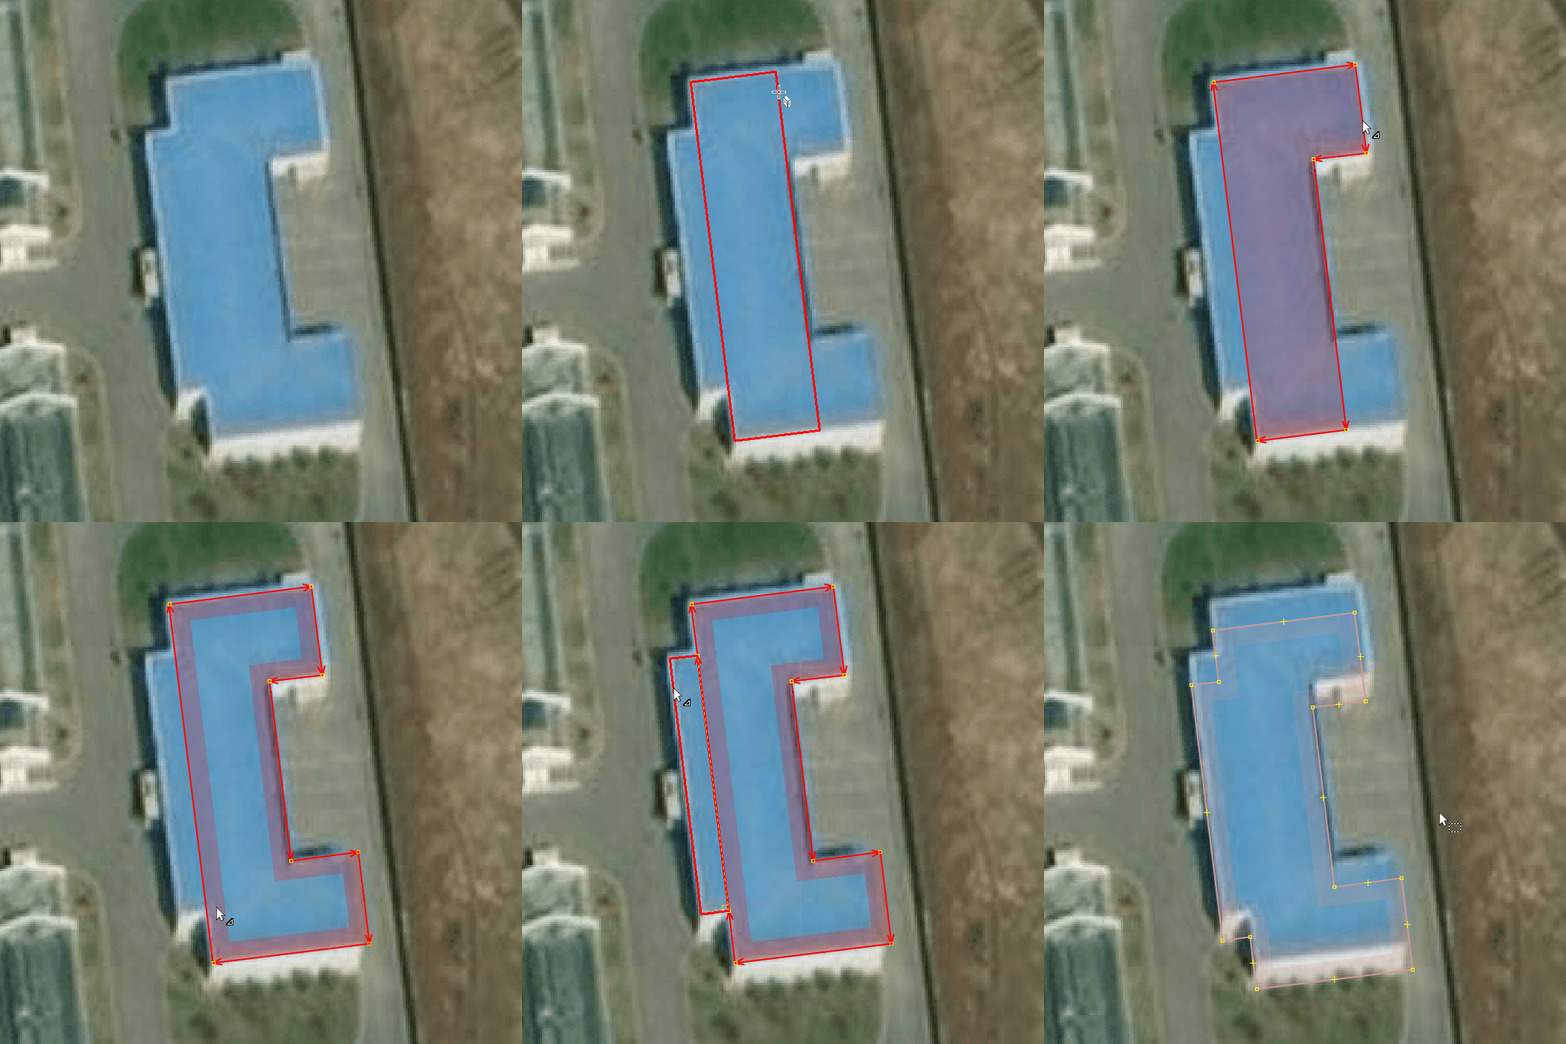
Because: Extruding each part doesn’t tell you whether they’re aligned, and the last rectangle on the left is not correctly aligned in the center.
Tip 6: Two points perfectly apart ⚫↔⚫.
✔️ Do

Tip 7: Perfect triangle 🔻.
✔️ Do

Because: Build a 6-point closed shape, make it round, remove the three unnecessary points. Without this, the triangle won’t have three sides of the same length, the triangle won’t be perfect. The “O” shortcut (to form a circle) won’t work with three points.
Tip 8: Perfect square 🔲.
✔️ Do

Because: The four sides are the same length and are perpendicular, otherwise the four sides won’t be exactly the same length.
Tip 9: Perfect star ⭐.
✔️ Do

Because: This ensures that all segments of the same size are perfectly symmetrical.
Tip 10: Right triangle 📐.
✔️ Do

Because: This ensures that the triangle is perfectly right-angled.
Tip 11: Parallelogram.
✔️ Do

Because: Moving two points in a rectangle makes it easy to create a parallelogram.
Tip 12: Rhombus ♦️.
✔️ Do

Because: A rhombus is easily made from a perfect square, from which you move two points symmetrically using Ctrl+Alt.
Tip 13: Ellipse 🕳️.
✔️ Do

Because: An elipse is obtained by using the building tool in the round (Alt+Z), then symmetrically moving the points on either side of a central segment. For greater precision, points can be added using Shift+B, then moved symmetrically away from each other.
Tip 14: Rectangle with cutoff angles.
✔️ Do
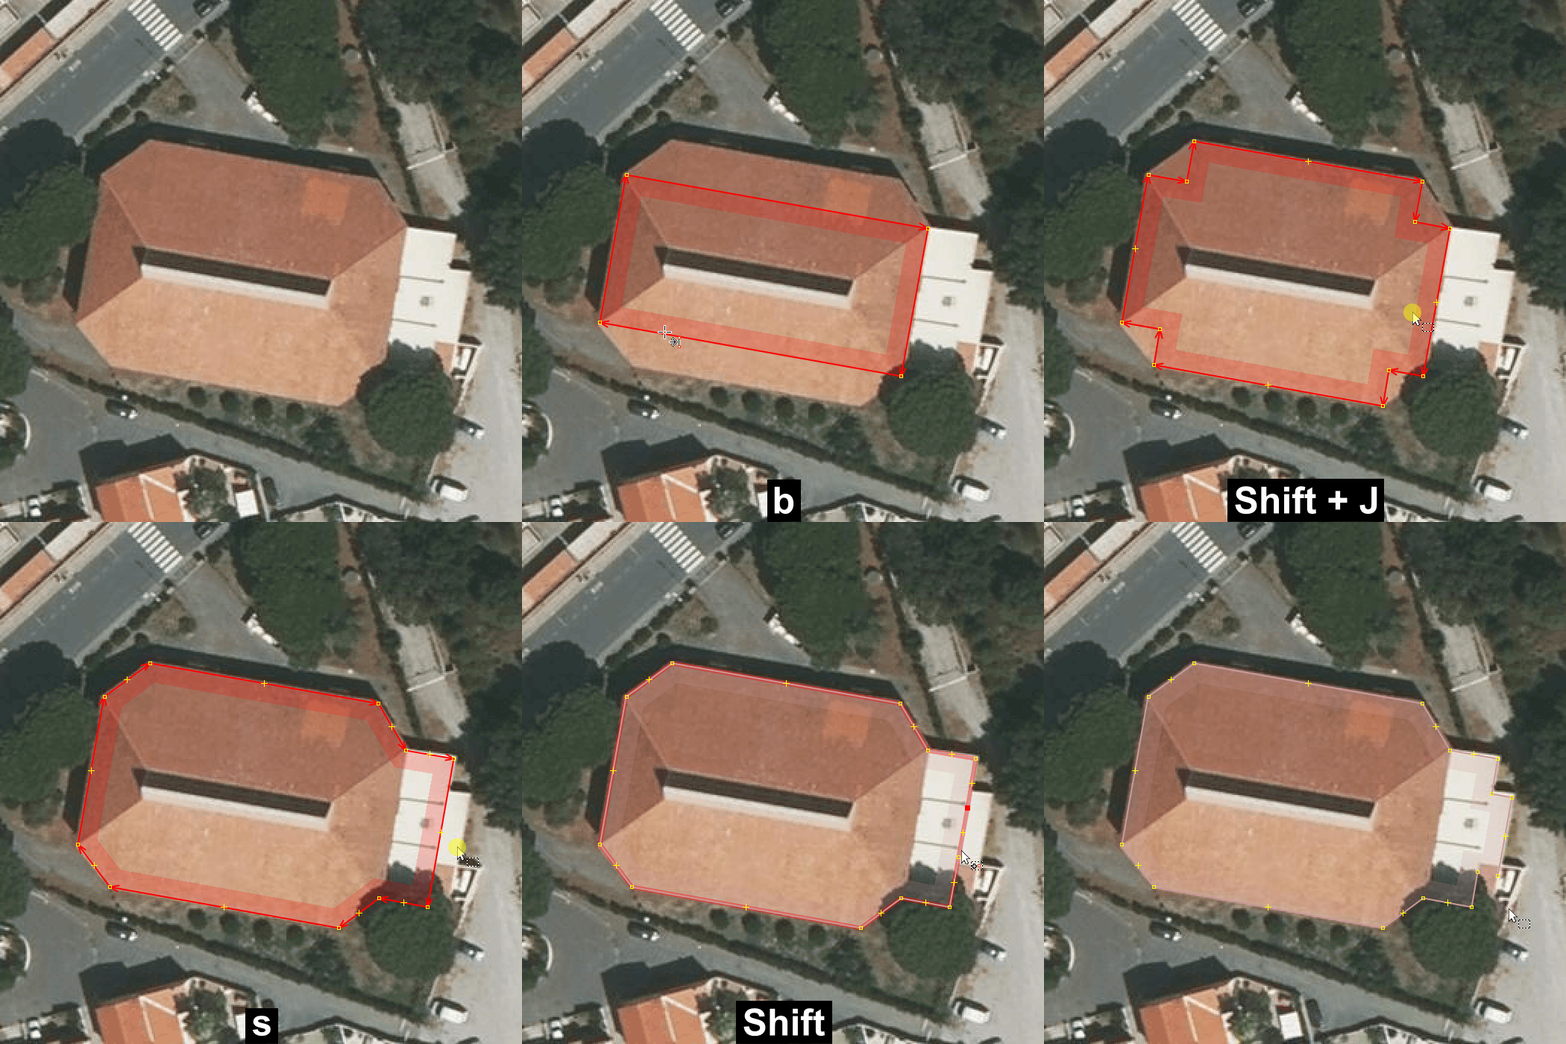
Because: a rectangle with cutoff angles can be obtained in many ways, the trick presented here consists of superimposing two rectangles, merging them and removing the unnecessary points.
Tip 15: Leisure track 🏃.
✔️ Do
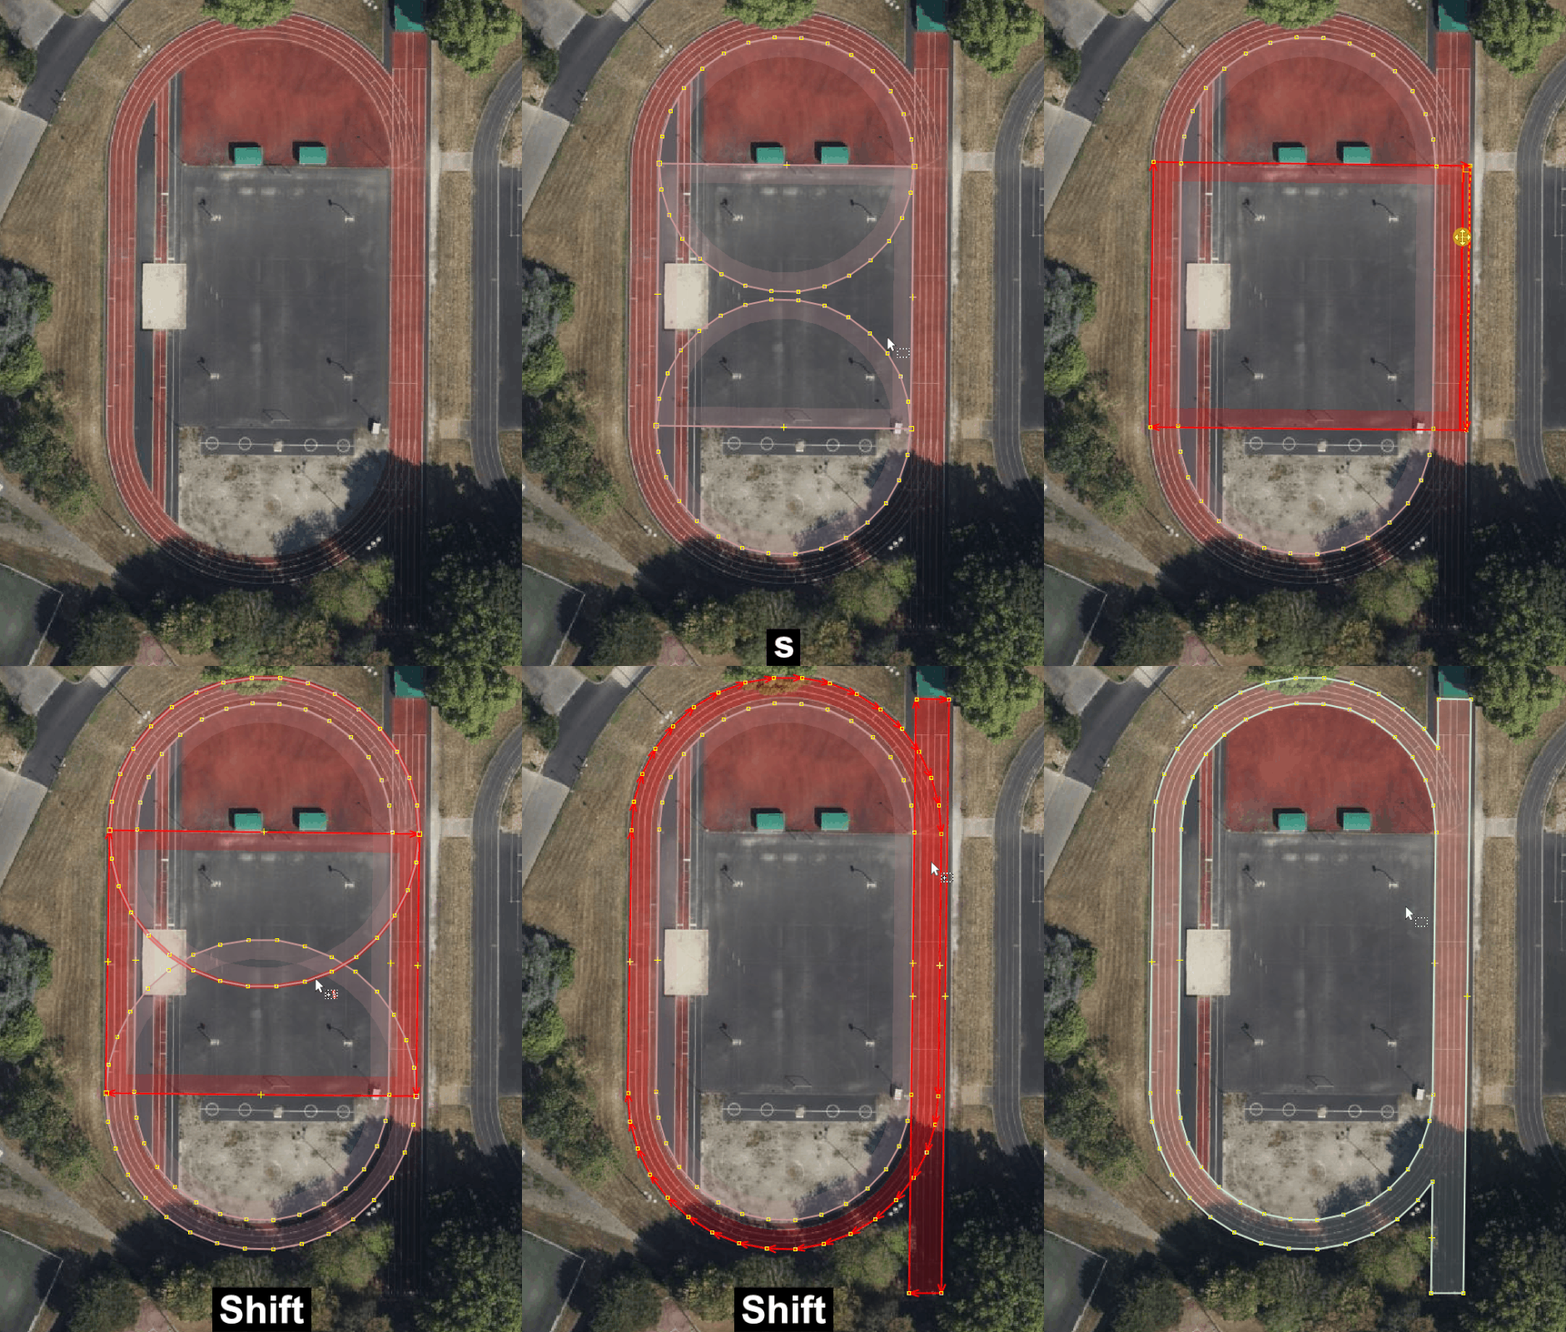
Because: An running track can be created by starting with a rectangle and adding circles on both sides, the same for the outer contour, with the addition of the sprint corridor, then making a multipolygon (shortcut Ctrl+B).
Disclaimer
They’re just tips on how to draw buildings in a precise way. I do it often, but there are many times when I don’t follow them, because it can be time-consuming. Still, I’m happy to try and do it so perfectly.
Edit 1 2024/09/02 : Change gif to add moving of buildings at the end of gif
Edit 2 2024/09/03 : Change gif to add all shortcuts used (Shift, Ctrl)
Edit 3 2024/09/07 : Add six new gif
Edit 4 2024/09/19 : Add emoji