
TLDR: No.
Very long version: Maybe
I was inspired by Feye Andal recent post, so I’m telling my experience and providing a workflow to those who face the same problem.
Background
Recently I was looking to buy an affordable 360 camera to capture street-level imagery and obtain the processed elements that Mapillary provides (traffic signs and other points, via AI). I wanted it to use on my PhD research and of course, contribute to the OSM community and map data. The main recommendation is the now a bit old GoPro Max 360. The product is solid, and very easy to connect to Mapillary.
However, when you look for reasonably priced 360 cameras (below 1000 US dollars), there are mainly 3 recommendations: the GoPro Max 360, the Insta360 X3, and the Ricoh Theta X. There are several use-cases, and these cameras are known to target the action-cam segment (especially the GoPro and the Insta360). Since this is not my case, and I was looking to the camera with the best image, I was mainly looking for that attribute only.
The Ricoh one seems to have the best image, but it is significantly pricier that the other 2 (costs around US$800, while the GoPro costs around US$400 and the Insta360 around US$450).
So, it all comes down to the GoPro Max X3 and the Insta 360 X3 camera. Since almost everybody in the OSM environment uses the GoPro, easy choice, right? Cheaper, very good integration with Mapillary, lots of available accessories… But, remember I was looking for a camera that takes good pictures? (I don’t need a camera to film myself snowboarding in the Brazilian winter, as heavily advertised by these companies).
 (not me)
Well, apparently the Insta360 X3 doesn’t have the stellar stabilization of the GoPro but has better photos! They also have a dedicated page in their website talking about using this camera for street-level imagery, and the accessories are easier to use (you just “plug-and-play” straight to the camera, which is not the case with the GoPro).
So, yep, I bought an Insta360 X3 without much research, and here’s me complaining about it.
Using it
With the camera on hands, I took some 360 photos, and the quality of the images is really good! So I went to try capture photos on the street, and this is where things went sour. First disappointment: the camera doesn’t have embedded GPS! How they advertise a camera to capture street-level images, without having GPS?!
Ok, this is entirely my fault for not properly reading all the specs (well, I did, but of course they didn’t include a line of “GPS = no” on their full specs). Luckily this is solvable using a smartphone, Apple Watch, or buying their Remote tool), so while this is an extra burden, it is not the end of the world. The caveat here is to have the smartphone screen on all the time, so the battery of the phone is also something to be taken care of during long trips.
With this solved, then which mode should I use? On the internet there is sparse and unofficial information on how to use the Insta360 X3 for capturing this kind of images (on the other hand, Mapillary has an entire page of giving the best workflow, for different cases, using the GoPro Max 360).
In my mind I believe that using Interval Photo mode would be the best (photos have better resolution than video, and it would use much less space and battery). Second surprise: for some reason, the Insta360 X3 only capture the location of the first photo! So if you go for a hike, capture a thousand of photos, all of them will have the location of the first photo… You can solve this recording the GPX separately (OSMAnd or anything) and sync later with the images, but the point here is to not have a lot of work every time you want to capture images (or I could go out with my mirrorless camera, walk every 5 meters, take many photos spinning myself like crazy, and then stitch them to create an awesome super 10000K 360 photo).
 (that’s me)
Ok, let’s keep calm and go for the video. Oh, great, they have Timelapse Video, with the highest resolution (8K). Here’s where things get weird (even more so!). First, up to two months ago, it was not possible to export the GPX from their Insta360 Studio software. You had to look to some other tools (exiftool or UL2GSV, for example), which is not practical at all.
Luckily, after many complaints, they updated their software (v4.8.10) to export both MP4 video and the GPX track separately. This still didn’t solve the problem (Mapillary didn’t accept this kind of files, so I had to use UL2GSV to not only export the GPX, but also breakdown the video into photos, and only then upload to Mapillary). Mapillary also heard the complaints and updated their software (4.1.6-beta), accepting the video and the GPX track. Great then, right?
Look, here’s a test with 2 sec interval photos:

- Yellow: GPX straight from Insta360 Studio
- Green: GPX from INSV file (exiftool/UL2GSV)
- Purple: real trajectory
What’s the reason of the difference between yellow and green? No idea… Also, it should be the same as real trajectory, but I suppose the camera only collects the location after 1 second of final recorded timelapsed video (and not for each snapshot). I don’t agree with that, but it is what it is.
So the only way is to capture using video mode (lower resolution, the filesize is enormous, and drains battery faster). I ran some tests, and the result is acceptable. The captured track seems good:

There’s lot of overlapping, but what happens when you zoom in?
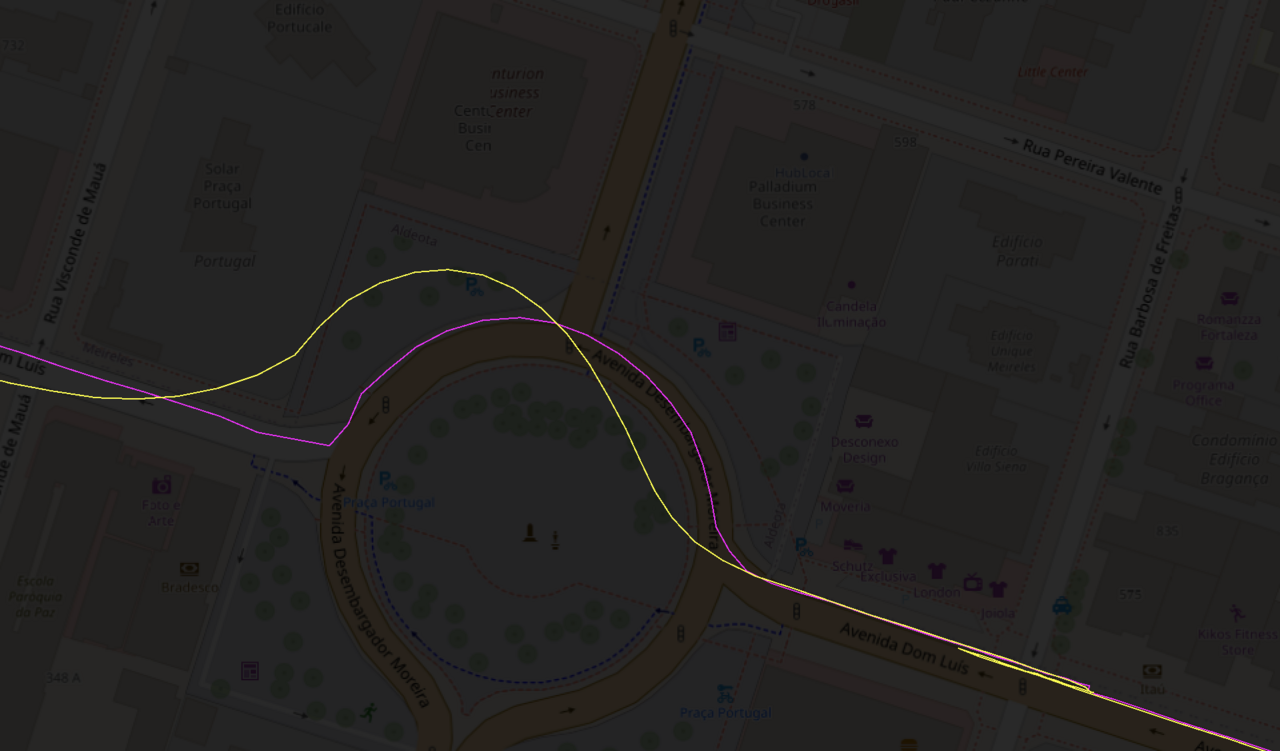
Ooops. The GPX that comes from Insta360 Studio (yellow) is different from the raw file! What on Earth???
Workflow
So yeah, using the Insta360 X3 as a street-level imagery camera is an adventure (more than snowboarding). But for those who somehow manage to read the whole text without using ChatGPT to summarize it, here’s my proposed workflow at the time (combined with many messages from Insta360 forum and Reddit, thanks guys!):
1 – open the Insta360 app in your phone, sync with camera on, select Video, click on the 3 dots in the superior right side, and activate GPS
2 – wait a bit to stabilize GPS signal
3 – start record video (max 30 min or it will break the video in many smaller videos)
4 – after recording it, open the INSV file on the Insta360 Studio software. On the right side, choose Stitching Options. Select Normal, Optical Flow Stitching, and Chromatic Calibration, then click Calibrate. Choose Media Processing. Select Color Plus, and adjust to your preference.
5 - Click the yellow Export icon. Select Export 360 Video, enter the file path for the exported MP4 to be the same folder holding your INSVs, set the Bitrate to 200, select H.264, then click Start Export.
6 – Use exiftool or UL2GSV (INSV2GPX option) to obtain the GPX from the INSV raw file
7 – Upload both MP4 and GPX (at the same time, or otherwise Mapillary might use the GPX from the MP4, which is wrong).
If you do cycling or walking, you could use Timelapse mode. Repeat steps 1-7 (1s and set the fps to 24) with this additional step:
6.1 - Use TL2VID to convert the time lapse to a regular video
Final considerations
I will run more tests (even Mapillary recommends videos for car-capture, and timelapse video for walking or cycling only), but now I am okay with my workflow. If I had to buy another camera again, I would go straight to GoPro Max 360. I still have hopes that Insta360 will improve their software/firmware, because the quality of the images is good (and I believe better than the GoPro)!
If you have the same camera and have a better workflow, please let me know!
Further reading
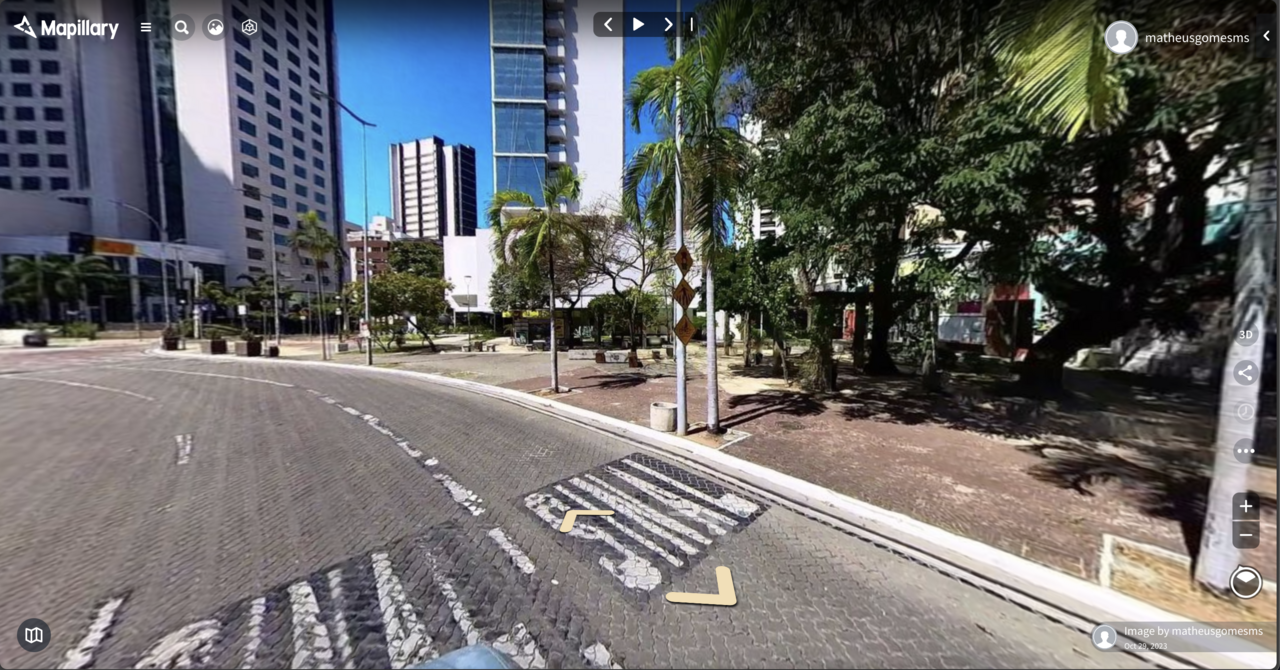
One of my surveys - video mode
Insta360 justifying why Timelapse doesn’t record GPS properly